Harvest Time
Harvesting your cannabis is that triumphant moment when months of love, late-night adjustments, and a little courage pay off. It’s exciting—maybe even a bit daunting—but oh so rewarding! The method you pick hinges on your plant count, their size, and your personal style. Whether you’re a newbie or a seasoned grower, timing is key.
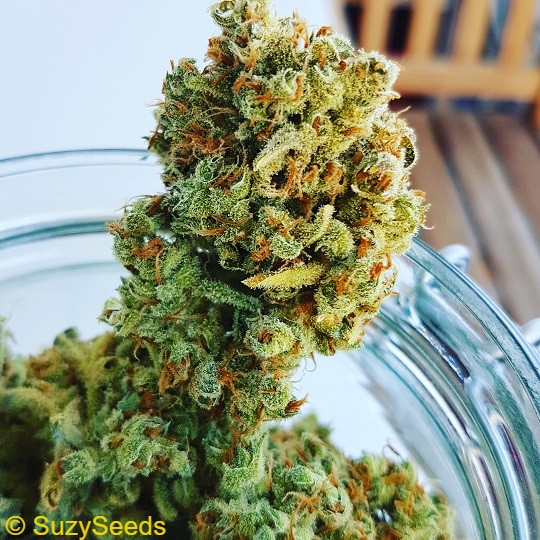
Start with a cheap jeweler’s loupe or phone macro lens to check trichomes—those tiny resin heads tell the story. Clear trichomes mean it’s too early (low potency), milky signals peak THC (great for energy), and amber leans toward a sedative high. Aim for 70-80% milky, adjusting by strain—sativas like Lunio OG might need a touch more amber for that bold kick. Pistil color (yellowing or curling) helps too, but trichomes are your true guide. Watch for strain-specific cues: our OG#18 line, with its robust genetics, often signals readiness with denser bud structure, even in tough outdoor conditions.
Setting Up Your Trimming Space
 Before you dive in, carve out a trimming spot. A well-ventilated room is a must—those plants unleash a potent aroma that’ll wake up the whole house! You might adore it, but neighbors? Not so much. If your grow tent or room is spacious, trim there with a fan on low to keep air moving—great for discreet setups in urban Europe or rainy UK gardens. For odor control, an extraction system with a carbon filter is a game-changer, especially if you’re shipping seeds globally and want to keep things low-key.
Trouble Tip: If the smell still lingers, a bowl of vinegar nearby can absorb excess odor—old-school but effective!
Trimming and drying in your grow tent
Turn your grow tent into a multitasking hero. Hang freshly cut plants upside down, then run your fan and carbon filter on a gentle setting. This wards off mold (a common foe in humid climates) and keeps odors tame—perfect if you’re tight on space or growing indoors year-round. Leave some airflow gaps; overcrowding is a rookie mistake that invites dampness.
Trimming wet
Wet trimming—cutting buds fresh—is a favorite for a reason. I love it because it lets you sculpt the buds with precision. Snip branches one by one, stripping fan leaves around the buds. Early leaf removal boosts light to lower buds, helping them fatten up—our OG#18 strains shine here, holding steady even in damp autumns. Those THC-rich leaves? Save them for hash or ice hash; pick ones with fewer trichomes for purer results. Wet buds trim tighter and look stunning, though it takes practice to find your flow. Smaller hands often excel at the delicate work, but anyone can master it with time.
By trimming the plants wet, you can trim them shorter and more clearly than when the buds are dry. The buds will look their best. The first time might be uncomfortable because you will try to find out which is the best way. But soon you will find a technique that works the best and the fastest for you. Trimming in itself is not hard but a good technique delivers the best final results. Women hands are slightly better for trimming than man hands. Because they are often smaller, they can work more sophisticatedly.
Suzy’s Tip: Suzy’s Tip: Invest in a quality trimmer—cheap ones dull fast or clog with sticky resin. Test a few (manual for control, electric for speed) and keep a spare. Wipe with isopropyl alcohol after use, and if resin builds up, a quick soak in warm soapy water saves the day.
Real-Life Scenario: First time? Expect sticky fingers and a learning curve. Start with one plant, take breaks, and don’t rush—quality beats speed every time.
Dry Trimming: A Different Approach
Dry trimming lets the plant air out first—cut branches, hang them up, then trim. It suits outdoor grows or when you’re juggling a big harvest with limited time. It’s slower, and dry buds are less forgiving—trimming can get messy, and some THC rubs off since they’re not as sticky. Still, with stable genetics like ours, you’ll retain plenty of potency. This method shines in dry climates or late-season outdoor plots where wet trimming risks mold.
Trouble Tip: If buds feel brittle, mist them lightly before trimming—too much, though, and you’re back to square one!
Drying Your Buds Right
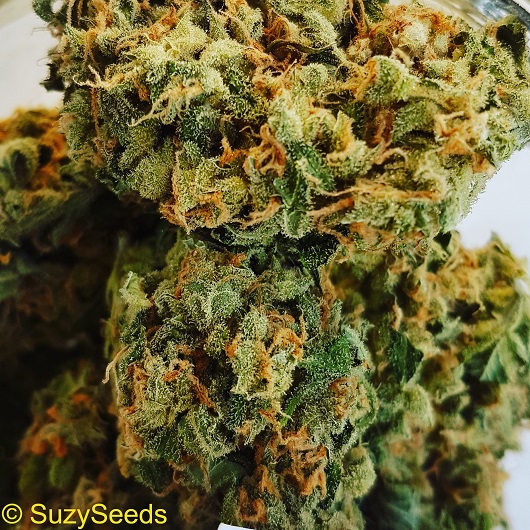
Drying is your bud’s make-or-break moment—mold after all that work is a grower’s nightmare! Aim for a cool, dark spot, 15-22°C, with no extra heat—slow drying preserves terpenes and potency. Use a small fan for airflow, and spread buds on a rack, not stacked (air pockets prevent rot). Small buds dry in a week, medium ones in two, and big chunky ones might need 16-20 days. Test by snapping a twig—if it cracks clean, they’re ready. For giants, break them into smaller clusters; it speeds drying and avoids a soggy core.
Suzy’s Tip: A drying rack with mesh layers is worth every euro—perfect airflow and easy monitoring. In humid areas, toss in a dehumidifier pack as a backup.
Real-Life Scenario: Had a mold scare? Check buds daily—gray fuzz means toss that section fast. Better safe than sorry!
 Storage and curing
Dry buds are smokable right away—go for it, you’ve earned it!—but curing unlocks their soul. Store in a cool, dark place, like a light-tight jar; light degrades THC over time. Mix wet and dry buds, and you’ll regret it—moisture creeps back quick. Cure for two weeks (a month total from harvest) for richer taste and a smoother high. Some strains, like sativas, might need 6-8 weeks to peak—trust your nose and taste test along the way.
Beware: If you store wet buds with dry buds, the dry buds will become moist again. You have to let the buds mature two weeks, making it a total of one month since the harvest. Thanks to the maturing process the buds will taste better and give a better high. After a month, the taste will have reached its best, although some strains need more time.
Curing like a pro
Curing elevates smoking or vaping. Use cure jars or preserving jars, targeting 62% humidity—humidity control packs (like Boveda) ditch the old-school “burping” hassle. Open jars weekly for 10-15 minutes to release excess moisture, especially in the first two weeks. This ripening deepens flavor and burns cleaner. New to this? Start with a small batch and adjust—it's a skill that grows with you.
Burping
An old skool method to cure cannabis. The not yet completely dried cannabis tops are put in large glass airtight jars. The preserving jar then aims for the humidity of 62%. This is done by opening the preserving jar daily for a few minutes. This allows moisture to escape, causing mold problems. Fortunately, people no longer have to burp, since the arrival of humidity control patches.
Time to smoke, vaporize, extract or make your own edibles!
You did it—you grew your own cannabis! Light up, vape, or experiment with kief, hash, or edibles. Those trimmings? They’re not trash—turn THC-rich leaves into hash with our easy guide. Sustainable growing is in for 2025, so waste nothing. Share your haul with us—we love seeing your success!